
Glue Pulling Dent Repair: Working a Damaged Quarter Panel at Autoseum
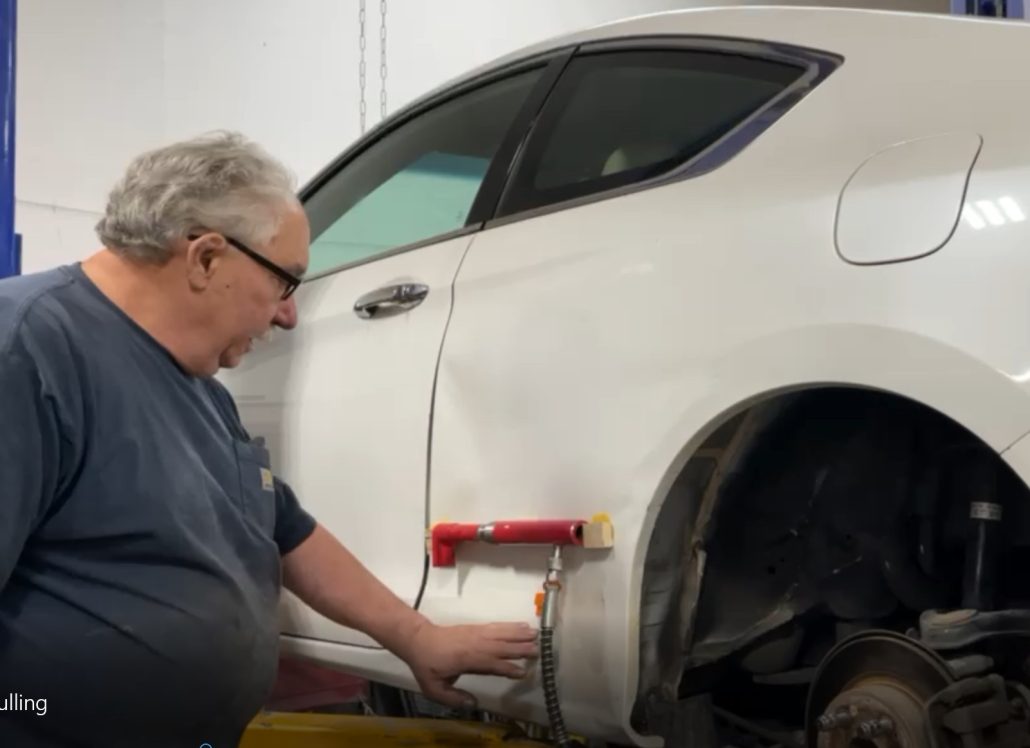
A dent repair often involves several adjustments to bring a damaged panel closer to its original shape. In this Autoseum video, a technician demonstrates an initial repair attempt on a white car’s rear quarter panel, combining glued wood blocks, controlled pressure, gentle tapping, and a suction cup puller.
Speaking to Mike, the technician describes the work as his first attempt at an “extreme push-to-paint” approach. The demonstration follows the first pull and introduces the next planned stage: installing pull tabs and using a bridge puller.
Starting at the Lowest Point of the Damage
The technician begins by explaining that he has glued wood blocks across the lowest point of the direct damage. These blocks form part of the setup used to apply force to the damaged area.
One immediate goal is to improve the gap between the door and the adjacent panel. As he explains in the video, he intends to put a little stress on the area to try to close that gap.
This gives viewers a specific detail to watch during the demonstration. The repair is concerned with both the dented surface and how the damaged panel sits beside the door.
Applying Pressure and Working the High Crowns
With the setup in place, the technician slowly operates the red lever to apply pressure. He then gently taps the metal beneath the red cylindrical pulling equipment.
In his explanation, he identifies this stage as relieving the “high crowns,” referring to the raised areas associated with the damage. The footage shows him working those areas before moving to the suction cup puller.
The sequence captures the measured nature of the attempt: apply some pressure, work the raised metal, and then make a pull. Each action is part of the effort to improve the panel’s shape.
Making the First Pull With a Suction Cup Puller
Next, the technician places the suction cup puller against the panel and pulls back to bring the dent outward. This is the first pull shown in the demonstration.
After checking the result, he comments that it “came out pretty good for the first pull.” His assessment describes progress at this stage rather than a completed repair.
That distinction helps explain the purpose of the video. Viewers are seeing an initial attempt and the technician’s reaction to it, with further work still planned.
Next Steps: Pull Tabs and a Bridge Puller
At the end of the transcript, the technician explains that the next step will be to install pull tabs and put the bridge puller on.
The demonstration therefore includes several distinct stages:
- Positioning glued wood blocks across the lowest point of the damage.
- Applying pressure with the aim of improving the door gap.
- Gently tapping the raised areas of the panel.
- Using a suction cup puller for the first pull.
- Assessing the initial result before the planned pull-tab and bridge-puller stage.
The supplied footage and explanation document the early work. They do not establish the final panel condition or show a completed paint finish.
Watch Dent Repair in Progress at Autoseum
This Autoseum video offers a close look at a technician working through an initial dent repair attempt. His commentary connects the tools and movements to specific goals, including improving the door gap and addressing the raised areas around the damage.
Watch the demonstration to follow the first pull and hear how he plans to continue the repair. For anyone interested in auto body work, it provides a practical view of a project as it develops.
Interested in building your automotive skills? Explore the automotive classes available at Autoseum.